


Tying wire is a crucial skill used in various fields such as construction, agriculture, crafts, and even in everyday life. It is especially useful when securing reinforcement bars before pouring concrete in construction projects. One of the most commonly used tie wire types for such tasks is 1mm wire, known for its strength, flexibility, and suitability for various purposes. In this article, we will explore two of the most effective methods for tying wire: using pliers and using hooks. Let’s dive into the details!

MỤC LỤC BÀI VIẾT
Why Tying Wire Correctly is Important
Tying wire is not just about twisting the ends together; performing this task correctly ensures several key benefits for your projects:
- Increased Strength: Properly tying wire ensures a secure hold, preventing it from loosening over time, especially under pressure or movement.
- Time and Labor Efficiency: Correct wire tying techniques reduce the need for frequent adjustments, saving time and effort, particularly in large-scale construction projects.
- Enhanced Aesthetics: Well-tied wire enhances the overall look and finish of a structure or craft, giving it a more polished and professional appearance.
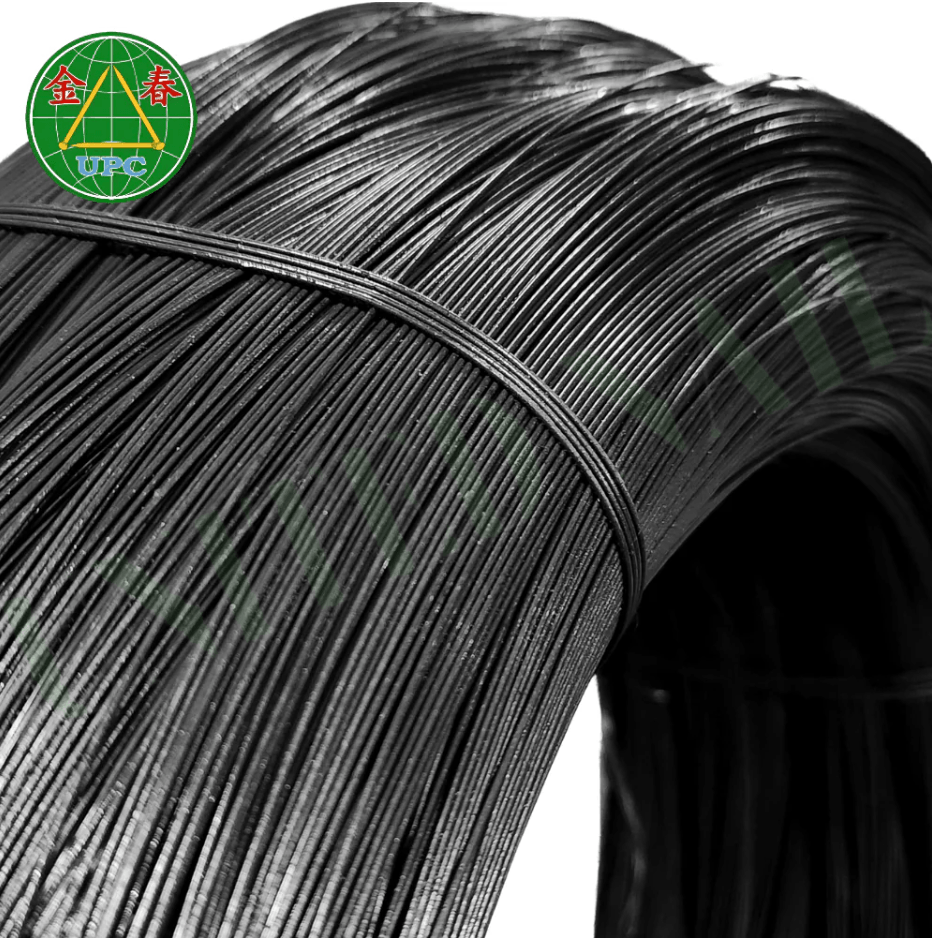
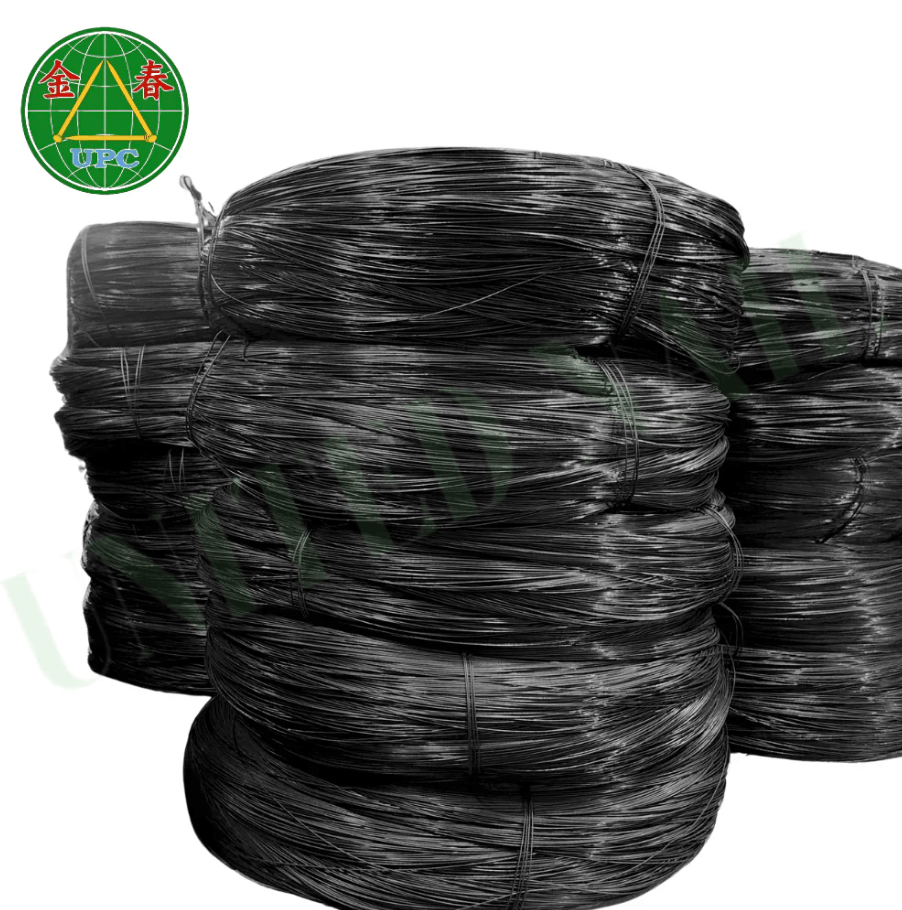
Choosing the right type of wire plays a significant role in the success of the task, and 1mm wire from United Nail stands out as a reliable choice. It offers superior strength, flexibility, and excellent rust resistance, making it ideal for a wide range of applications.
You can check out more about the 1mm wire from United Nail here.
Preparing to Tie Wire
Before you begin, ensure that you have the necessary tools and materials:
- 1mm wire: This is the most commonly used wire due to its strength and flexibility.
- Pliers or wire hooks: Depending on the method you choose.
- Protective gloves: To ensure safety while handling the wire.
- Wire cutters or pliers: For cutting the wire to the desired length.
You can refer to more information about the tools used for tying wire here.
1. Tying Wire Using Pliers
Tying wire with pliers is the traditional method and is widely used due to its simplicity and effectiveness. Here is a step-by-step guide on how to do it:
Step 1: Cut the Wire
Use wire cutters to cut a length of wire. The length should typically be 2-3 times the diameter of the item you are tying. Make sure not to make it too long or too short—just enough to wrap around and secure the object firmly.
Step 2: Position the Wire
Wrap the wire around the item you are tying (such as a rebar). Ensure that both ends of the wire are of equal length, and position the wire properly before tightening.
Step 3: Twist the Wire
Using pliers, twist the ends of the wire in a clockwise or counterclockwise direction. This action should be done evenly and with moderate force to create a strong knot. Be sure not to twist too tightly to avoid breaking the wire, but also not too loosely to ensure the wire holds securely.
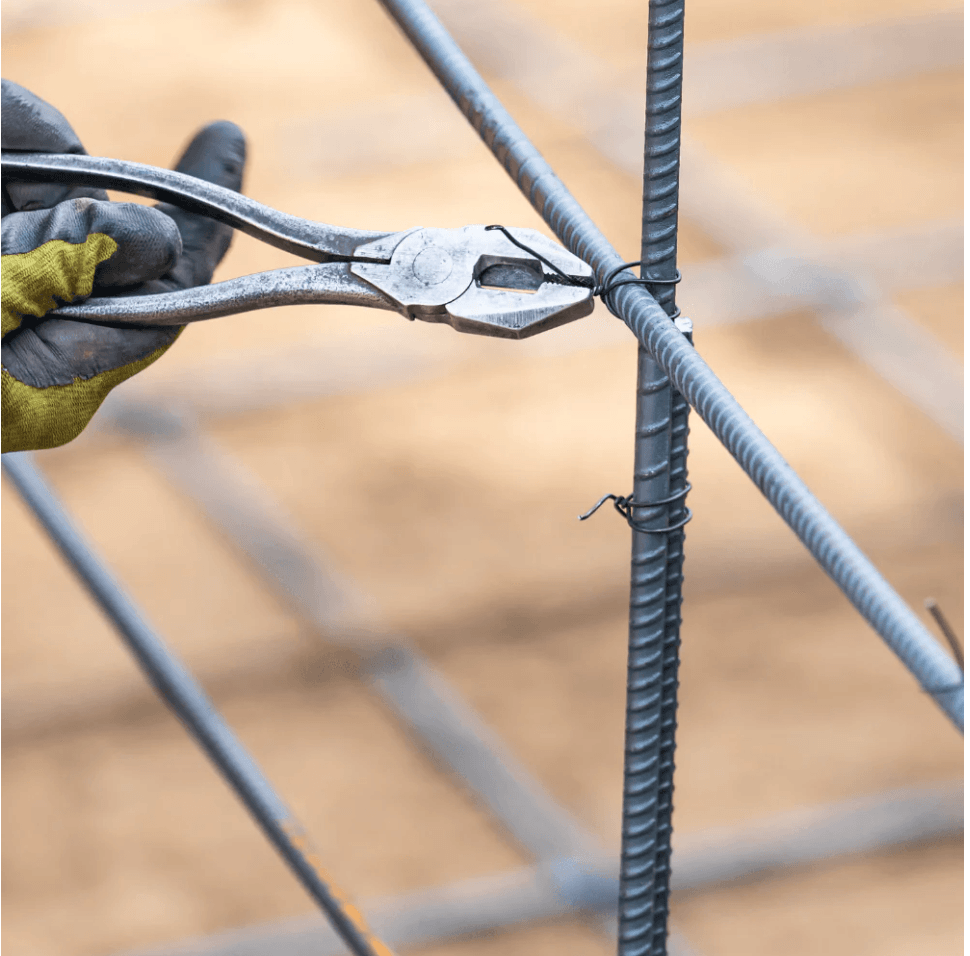
While twisting, use the pliers to tighten the wire against the rebar, ensuring a firm fit.
Step 4: Cut Off Excess Wire
Once the wire is securely tied, check the knot’s strength and cut off any excess wire. For added safety and aesthetics, lightly tap the end of the excess wire into the steel frame with the pliers. This step helps prevent injuries and keeps the worksite tidy.
When using United Nail’s 1mm wire, the twisting and securing process becomes easier thanks to the wire’s high flexibility and strength.
2. Tying Wire Using Hooks
Tying wire with hooks is an efficient and fast method, especially when dealing with larger quantities of wire. This method is widely used in construction projects where speed and efficiency are essential. Here’s how to do it:
Required Tools:
- Wire hook: This is a specialized tool with a rotating handle designed to tie wire quickly.
- 1mm wire: The same wire used in the pliers method.
Step 1: Prepare the Wire
Cut the wire to the desired length, just like in the pliers method. Typically, the wire should be slightly longer than needed to ensure it’s enough to wrap around the object.
Step 2: Place the Wire Around the Item
Wrap the wire around the object you are tying, ensuring that both ends meet and form an “X” shape.
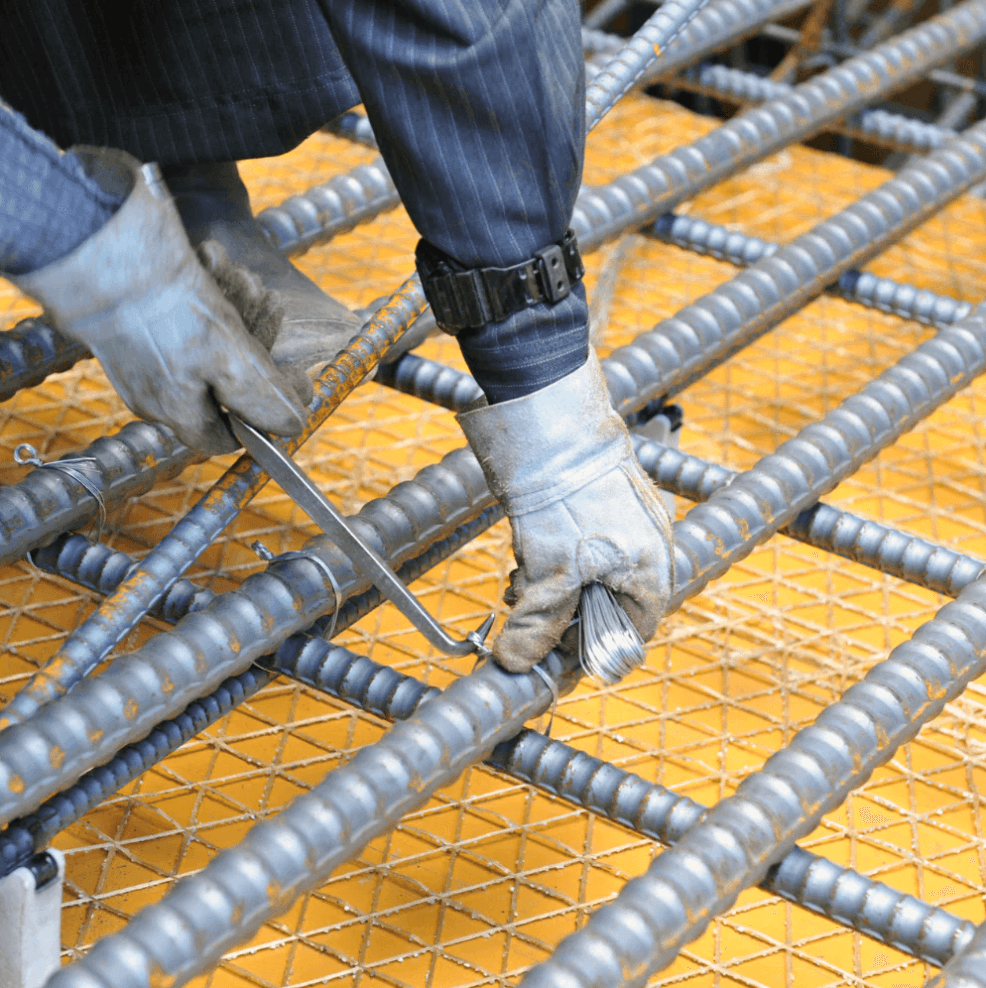
Step 3: Use the Hook
Insert the hook into the intersection of the two wire ends. Rotate the hook’s handle in a clockwise direction. The twisting action will automatically tighten the wire without requiring much force from the user.
Step 4: Final Adjustments
Once the wire is tightened to the desired level, remove the hook and cut off any excess wire.
Advantages of Using the Hook Method:
- Speed: The wire is tied much faster, especially useful when handling large amounts of wire.
- Less Strain on the Hands: The hook significantly reduces the amount of force needed, minimizing hand strain during continuous tasks.
Important Tips for Tying Wire
Whether you choose to use pliers or hooks, there are a few key considerations to keep in mind to ensure high-quality results:
- Choose the Right Wire: Always use 1mm wire for optimal strength and durability.
- Apply Appropriate Force: Don’t apply too much force when twisting; too much pressure can break or deform the wire.
- Regularly Check Ties: Ensure that the knots are secure throughout the duration of the project.
- Wear Protective Gloves: Always protect your hands when handling wire to avoid cuts and injuries.
Applications of Wire Tying Techniques
The technique of tying wire is widely applied across various fields:
- Construction: Primarily used for tying rebar, securing scaffolding, and installing safety nets.
- Agriculture: Used for creating plant supports, securing fences, and fastening farming tools.
- Crafts: Wire is used to connect small parts and create unique designs.
- Household Repairs: Tying wire is often necessary for quick fixes or binding items together.
United Nail’s 1mm wire is a preferred choice for all of these applications due to its durability and flexibility.
To learn more about our high-quality 1mm wire, visit our official website here.
Exceptional Services from United Nail
- Competitive Pricing: Our products balance quality with affordability.
- Fast Delivery: We guarantee on-time delivery, both locally and internationally.
- Customer Support: Our experienced team is always ready to help you choose the best products for your needs.
By using United Nail’s 1mm wire, you ensure your projects are secured with the highest quality material available, helping you achieve safe, durable, and professional results.
Contact Information
UNITED NAIL PRODUCTS CO., LTD
Specializing in high-quality nails and small coil wire production
Thank you for taking the time to read this article. We hope the information proves helpful to you.